[TOC]
Text Editors
It is said there are three text editors in the world:Emacs, Vim and others. No matter whether it is true or wrong (depending on you), you cannot deny that Emacs and Vim are two powerful text editors. The debates between Emacs group and Vim group have never stopped.
Emacs is considered as 'God's editor' while Vim is 'the God of editor'.
Emac is actually an OS which pretends to be an editor.
Why Vim
With curiosity, I did search and found the following picture describing the learning curves of some common text editors.
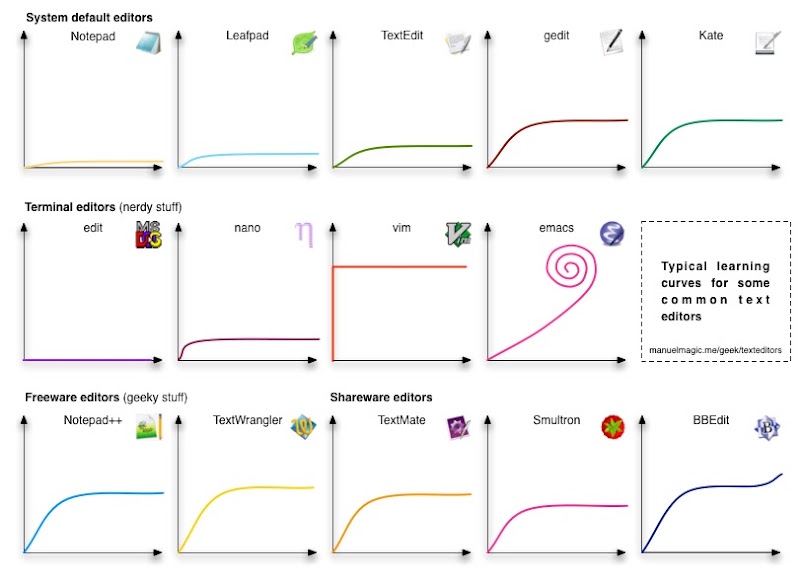
Study Curve of Editors
It can be seen Vim has a very steep study curve and Emacs has a @#$%^&* ...
I choose Vim because it can be used in any OS, extendibility, and it looks cool!
MacVim Installation
Mac has Vim already in terminal, but MacVim works better than the vim in Mac.
There are two methods to install MacVim:
-
Download MacVim and follow the instructions in
README_mac.txt.You can open MacVim directly as a normal app. This method help to configure MacVim easier.
You can also open MacVim from Terminal once you set by this (temporary):
$ alias mvim='/Applications/MacVim.app/Contents/MacOS/MacVim'
With this installation method, I do not know a simple method to change persistently after upgrading to El Capitan with rootless usr folder. If you know, please tell me.
-
To install MacVim by Terminal (You must have installed Homebrew):
$ brew install macvim
To start MacVim:
$ mvim
Ready to Use ?!
Basic Level
After you start MacVim, it is in the mode normal, to enter mode insert, press i. You will see -insert- at left-bottom corner of Vim. If you want to return normal mode, press ESC. All the commands should be done in normal mode.
Some basic command:
i   → Insert mode
ESC → Normal mode
x   → delete character
:w  → save file (add file name after :w)
:q  → quit
:wq → save file and quit
dd  → delete the present sentence and copy to clipboard
p   → paste from clipboard
hjkl → (←↓↑→)
:help <command> → display the help
Practice and you can do the basic job that Notepad can do.
Advanced Level
As mentioned before, Vim has a very steep learning curve. If you want to learn more, please practice with online tutorials. Please practice every week and do not use it at work before you can really efficiently use it.
Study Resources
Basic:
-
vimtutor:
$ vimtutor -
vimtutor (CN):
$ vimtutor zh -
Vim-Adventures: game to familiar with the basic hotkeys.
-
Interactive Vim Tutorial: online typing tutorial
So what do you think of it? Do I miss something? Leave your comments below...